Thursday, June 4, 2015
How To Create Transparent Images For Blog Posts
Blogging and creating a powerful blog post is impossible without images. Images makes a blog post more interesting and easy to understand. Two things which grab interest of visitors are title and images. Other things are also important to create a powerful post like good content, colorful post and frank behavior. As images are important for a good post therefore images should be created in such a way that suits your post. For example some bloggers add effects to images. Sometimes transparent images are needed in post but most of blogger don't know how to create transparent images, so in this post I will show you how to create transparent images using online tools. So in this post you will learn two things:
(1). How to create a new transparent image for blog post.
(2). How to make an existing image transparent.
How to create a new transparent image for blog post:
Step 1: Go to http://apps.pixlr.com/editor/
Step 2: Click on create new image.
Step 3: Give a title to your image, choose a size or set a custom size of image and check the transparent option.
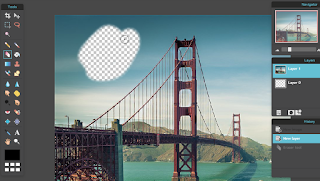
Now you will have a transparent background, just create your image and move to step 4.
Step 4: Use Ctrl+S to save your image.
Choose "PNG(Transparent, full quality)" as image format and click on save.
Congratulations! you are done successfully.
How to make an existing image transparent:
Step 1: Go to http://apps.pixlr.com/editor and click on create a new image, choose a size for your image and mark the transparent option.
Step 2: Open your image from computer or url.
Step 3: Use Ctrl+A to select your image and then use Ctrl+X to cut it.
Step 4: Now close the new image tab(which is opened because you have opened an image to change its background with transparent) and paste your image which you have grabbed in step 3 on the transparent background.
Step 5: Remove all the unwanted background which you want to make transparent by using eraser tool.
After creating your image just save it as you saved the previous one and you are done! You can change the mouse cursor by choosing other cursor just above the editor.
Now if the images aren't transparent after upload then you need to make some changes in your blog template so follow below steps to make these changes.
Step 1: Go to template and click on customize.
Step 2: Click on Advanced and then on Images.
Step 3: Click on Background color and mark the transparent option as shown in below image:
Step 4: Click on Apply to blog button on the top-right corner of the page.
Congratulations! you are done successfully. You can make further customizations too like removing border of images and caption text color.
Hope you like this post and it helped you out, follow 101Helper by E-mail to get instant updates. Share this post with others.
Subscribe to:
Post Comments (Atom)


No comments:
Post a Comment